Tired of seeing DigitalChalk as the ‘From Address’ when you send emails using DigitalChalk notifications? Would you like your notifications to show your email address? No worries, that doesn’t hurt our feelings one bit! We want you to have the most optimal branding capability on our system, and we’ve partnered with an email provider called SendGrid to make that happen.
It may sound like you would need an engineer, or be computer savvy to make this happen. In reality, it is a very simple process, made even more simple with our how-to guide that will walk you through it. Follow the instructions below to begin using SendGrid for your DigitalChalk emails,
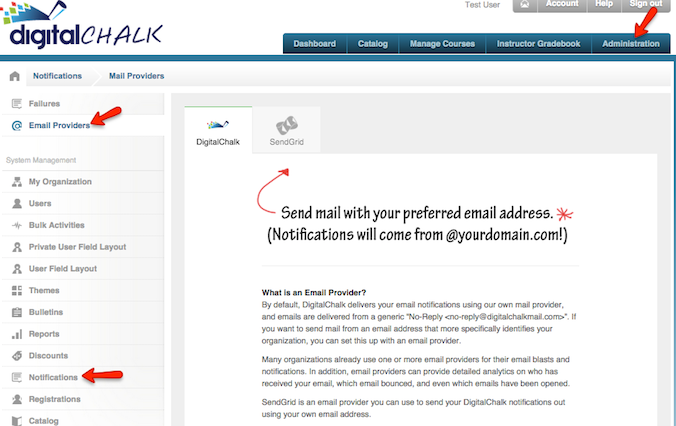
1. Access SendGrid from your organization on DigitalChalk:
-
Click the Administration tab.
-
Click Notifications from the System Management list.
-
Click Email Providers from the Notifications list.
-
A mini-guide for setting up a SendGrid account from DigitalChalk is displayed, with general steps and a way to provide additional information you may need before you begin. You also see two tabs, one for DigitalChalk, and one for SendGrid
-
Click the SendGrid tab.
- The SendGrid Configuration window is displayed.
- Click SendGrid DigitalChalk Setup.

-
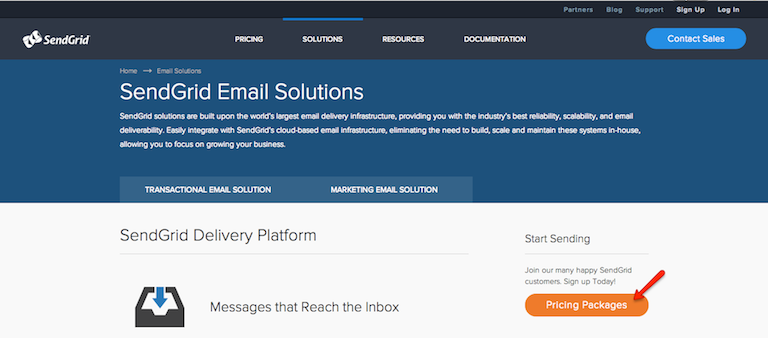
The SendGrid home page is displayed so you can set up your SendGrid account.
-
Click Pricing Packages to see a description of the email options available from SendGrid.
-
Click Get Started to select a monthly email plan, and follow the instructions to set up your SendGrid account.

-
Wait for an email from SendGrid asking you to confirm your account information (this can take up to 2 hours).
-
After you confirm your account information with SendGrid, return to DigitalChalk, and click the SendGrid tab on the SendGrid Configuration window.
3. Connect DigitalChalk and SendGrid:
-
Save: Enter the SendGrid Username and Password login and the email address you entered on the SendGrid website and click the Save button.

-
The SendGrid Configuration window is displayed again with a Validation button.

-
Validate: Click the Validate button.
-
The SendGrid Validation window is displayed.

-
Enter the email address to which you want DigitalChalk to send the validation email and click the Send button.
-
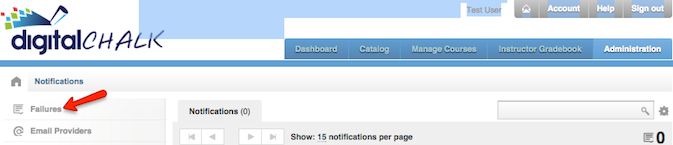
A validation message from DigitalChalk is displayed. If you don’t see a validation message from DigitalChalk, click Failures from the Notifications list to see why.
-
After you receive the validation message, close the message window.
-
The SendGrid Configuration window is displayed again with an Activate button.

- Activate: Click the Activate button. You have finished setting up your SendGrid account for your DigitalChalk email. You can also use SendGrid to find out additional information about your DigitalChalk emails, such as how many emails bounced, were sent to spam, and were actually opened by your students.